Getting Started - AWS Features
This section will show you how to create your first profile so that you can log in to the AWS console and work with bookmarks.
Prerequisite
Part 1 of the getting started guide: 1. Installation & Settings must have been completed before continuing.
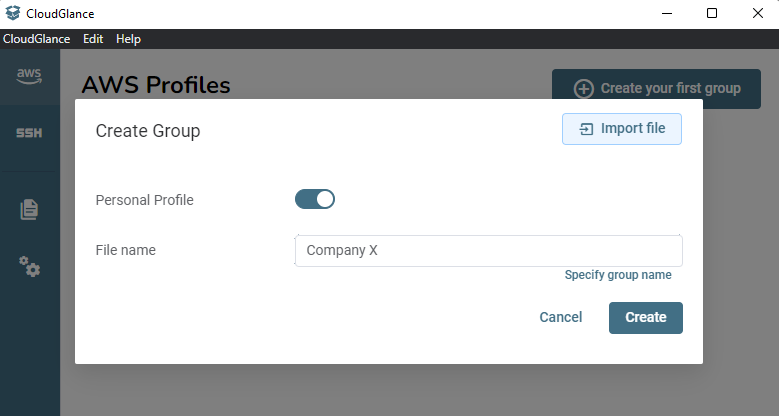
Step 1: Create a Group
Now that you are configured, head over to the AWS section using the left-hand menu and click on Create your first group.
Keep Personal Profile selected, the alternative is to specify a Hosted Profile which means the group will be placed in a GIT managed directory.
Then give the group a name, a single file can have more than 1 group but for now assume that a single file is a single group. Assign the File name field as if it is the group name.
Most of the time you would assign the group name to be the company name. Then within the group, we will add all the AWS accounts related to it.
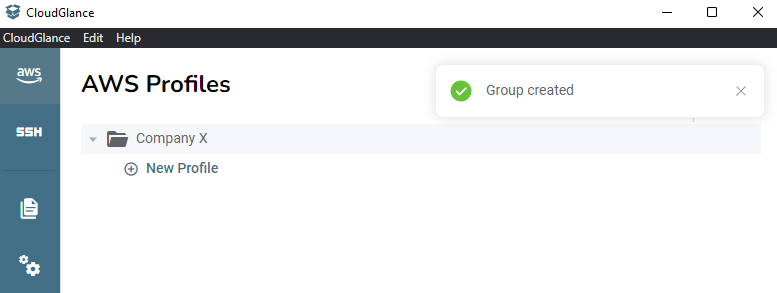
Step 2: Create a Profile
Click on the New Profile text button under the group to add a new AWS Profile to it.
This brings up a modal with three tabs. For this example, we will select IAM User and then Federated Login.
Assign the Cloud Glance required fields like the Name and the Firefox Container Name.
The encryption option is only available when storing aws_access_key_id and aws_secret_access_key. We will skip this option for now as we did not install the Cloud Glance CLI yet which is required for encryption to work.
Moving on to the AWS Profile section we find the Profile input. This is the AWS profile name as stored in your ~/.aws files. Cloud Glance will detect all the current profiles you have and you can select an existing one. Selecting an existing one will fill in the Access Key ID, Secret Access Key and Region fields.
Alternatively, you can create a new Profile by typing a name and then selecting it from the combo box. Be sure to fill in the other required fields that were autofilled before.
The last field for an IAM User - Federated Login, is to assume a policy. Let's assign the Assume Policies field the value of arn:aws:iam::aws:policy/job-function/ViewOnlyAccess for now. We are assuming that you do have enough access to this AWS account.
TIP
For your convenience, you can click on the link text below Assume Policy to see a list of commonly used AWS managed policies.
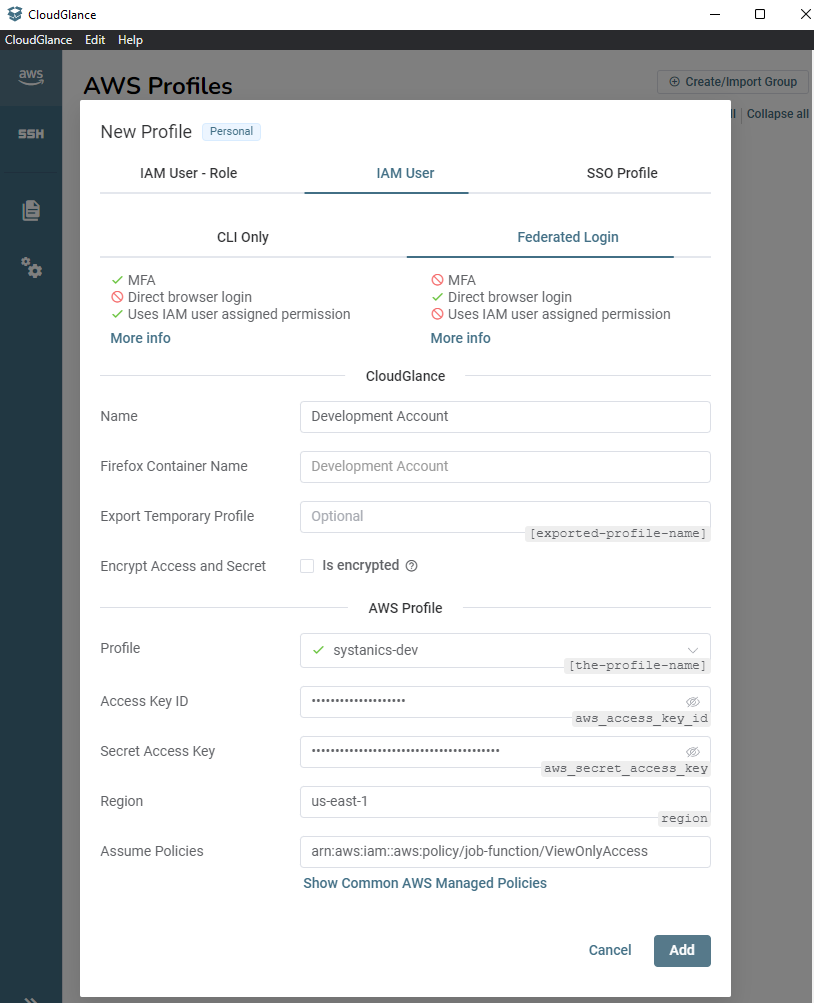
Click on save and wait a few seconds, ~3 or more. We are calling the AWS CLI V2 executable and setting all the profile values that need to be set.
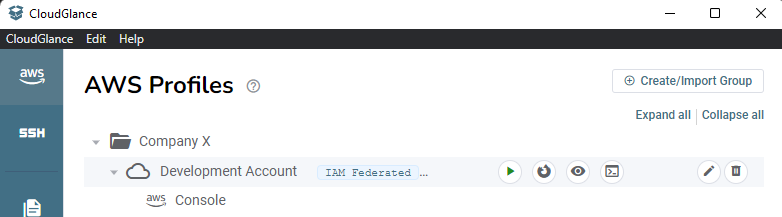
Step 3: Open the AWS Console
There are 4 action buttons (excluding the edit and delete profile buttons on the end) next to each profile:
- Start button - Login and gets the token, setting the exported profile if specified.
- Firefox button - Opens the AWS console in the correct Firefox container.
- Eye button - Opens the AWS console in a new application window (internal "Cloud Glance Browser").
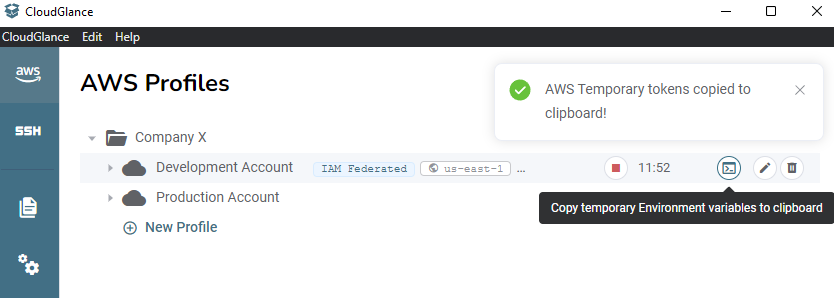
- Terminal button - Copies the temporary STS credentials in environment variable format into your clipboard. See step 6.
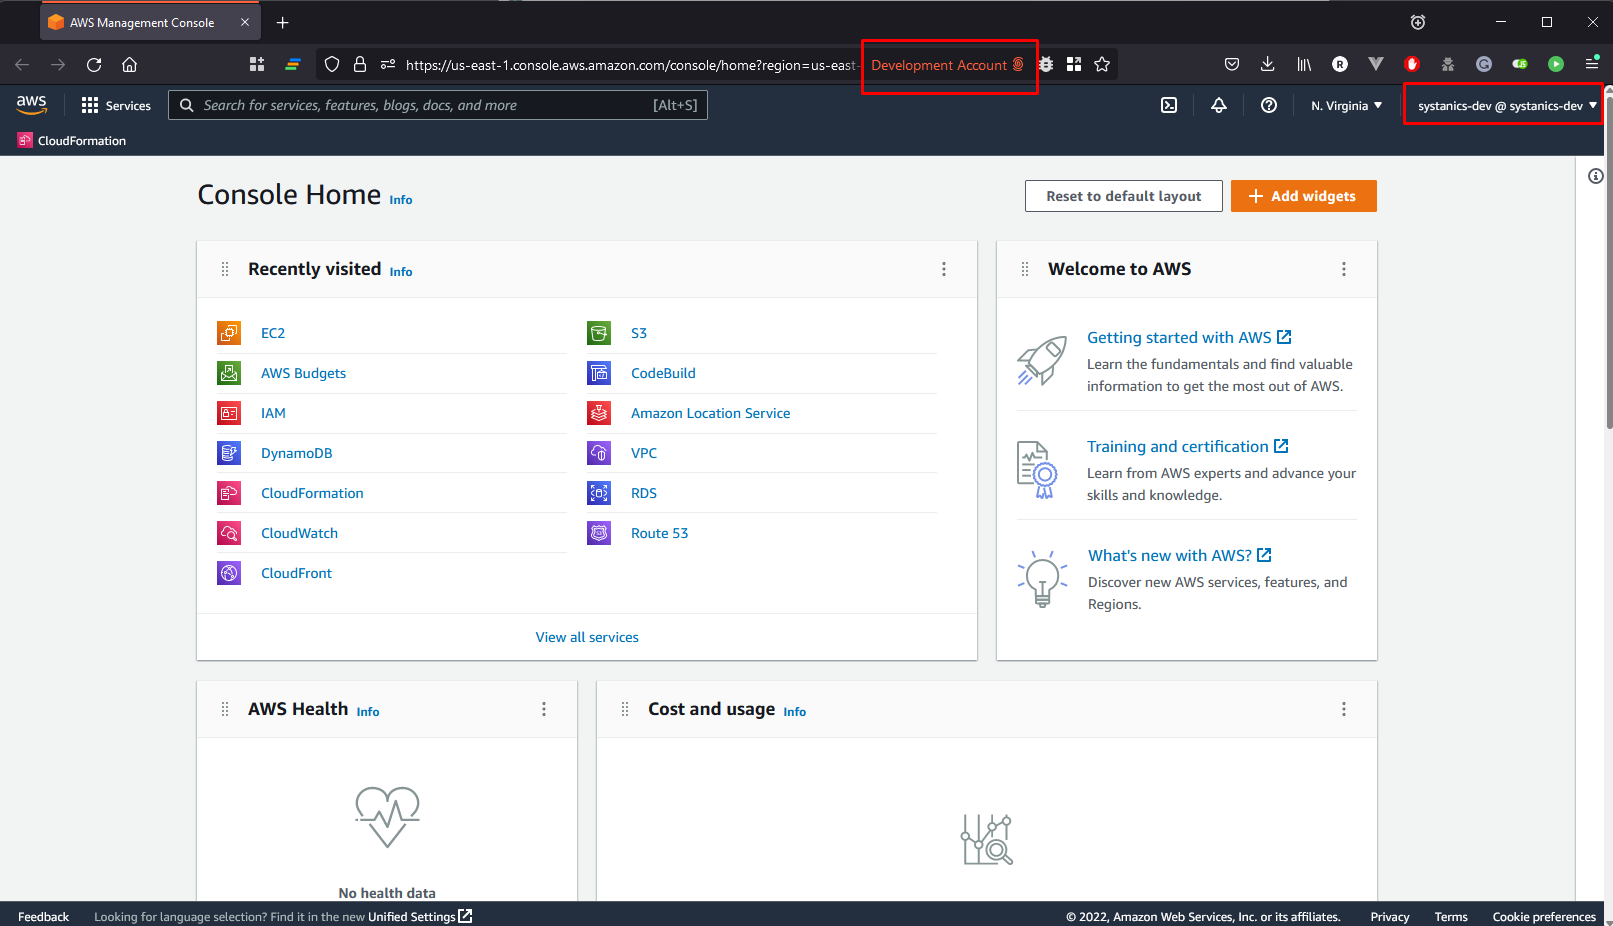
In Firefox
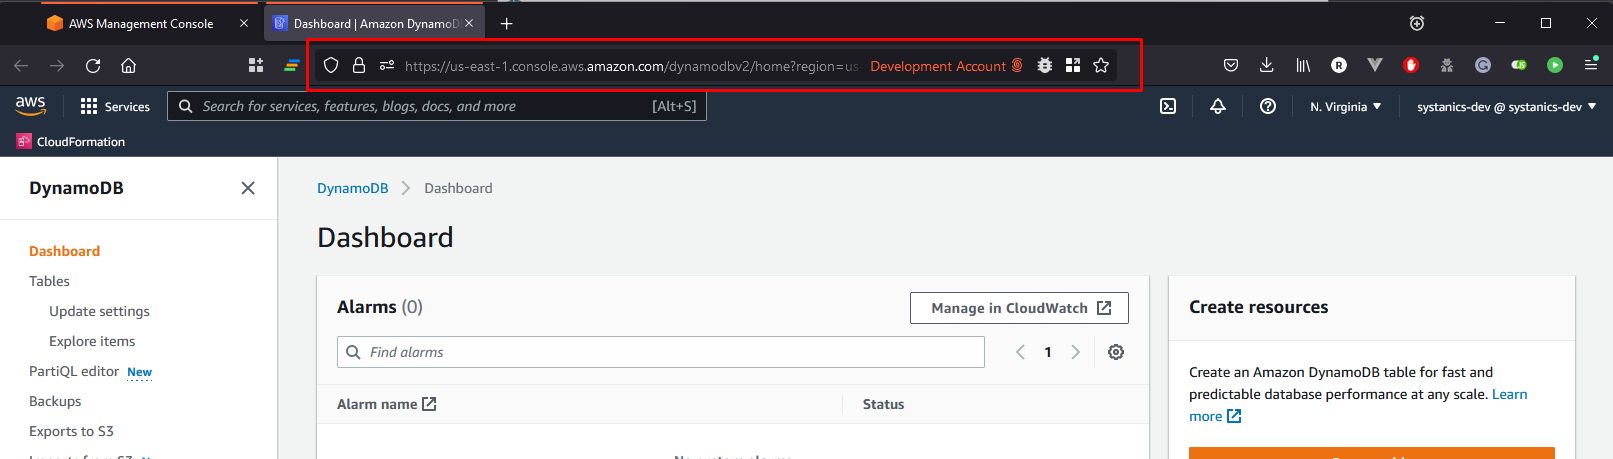
Click the Firefox button to open the AWS console in Firefox within the specified Development Account container.
Here we can see the name of the current Firefox container is indeed Development Account and notice the color of the tab.
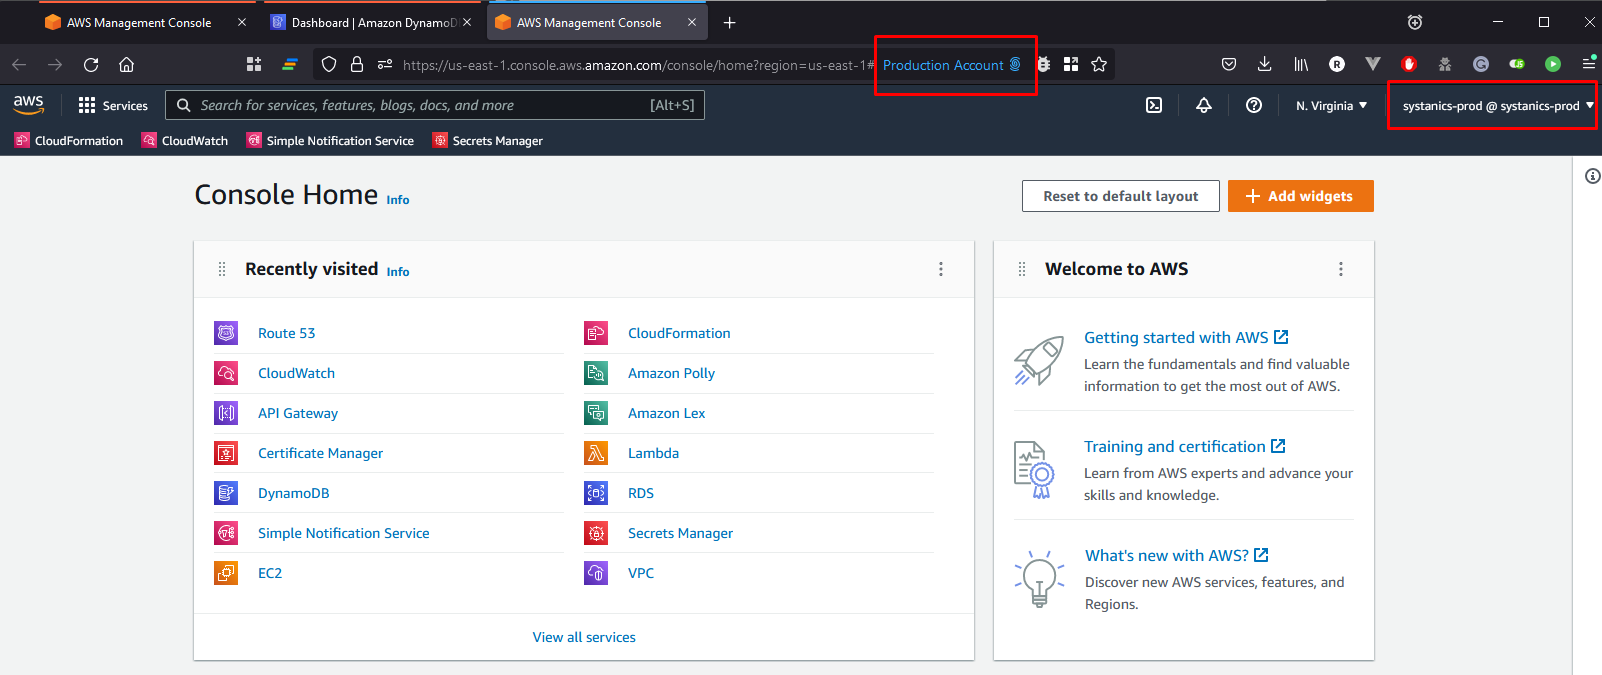
We can add another Cloud Glance profile called Production Account.
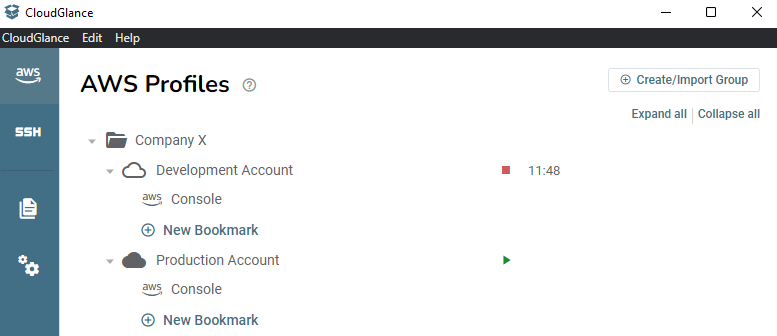
Clicking on the Firefox button will also open the AWS console in Firefox, but within the Production Account container. This shows that we can have multiple AWS consoles open within the same browser at the same time.
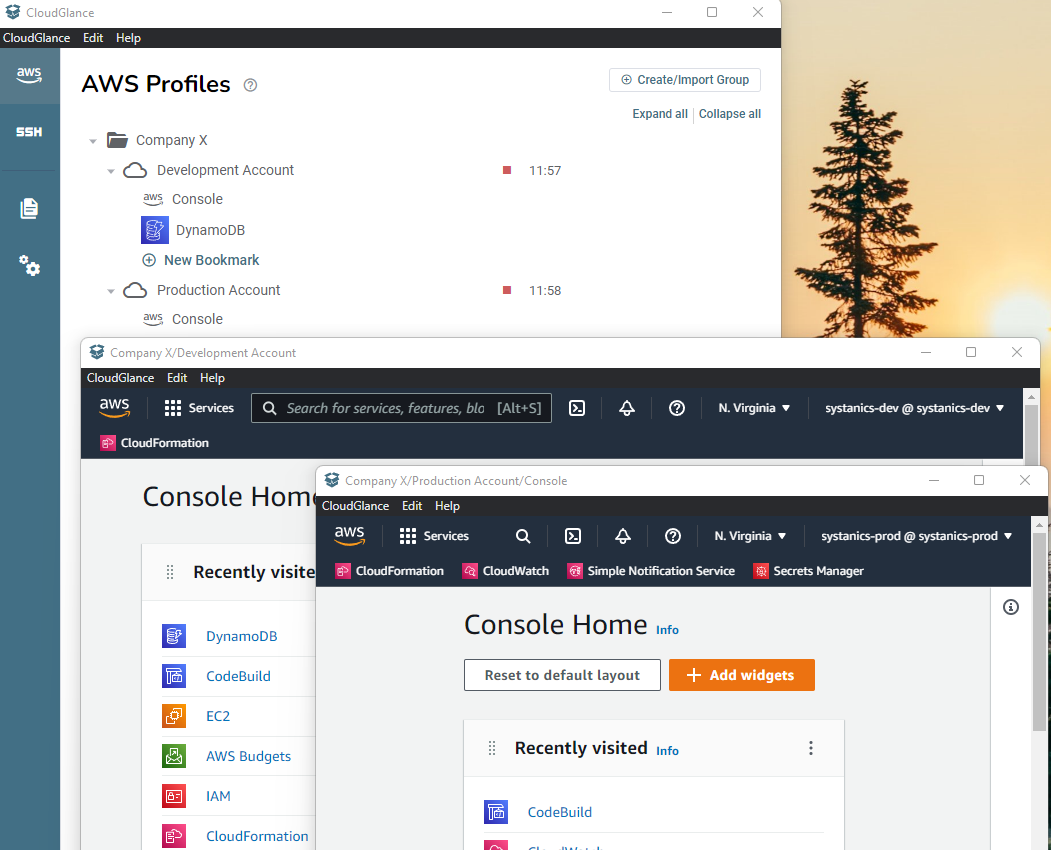
In Cloud Glance (app window)
Sometimes you may want to quickly view (aka Glance 😏) the page. Clicking on the Eye button opens the page in the "Cloud Glance Browser" which is just an in-app window. You can thus use Cloud Glance without Firefox.
Step 4: Create a Bookmark
Cloud Glance created a default Console bookmark. We can add any AWS link as a bookmark, like a specific Cloud Watch log group or dashboard URL for example.
Let's create one that goes to the DynamoDB console. Click on New Bookmark, assign the Name and make the URL to be https://console.aws.amazon.com/dynamodbv2/home?region=us-east-1
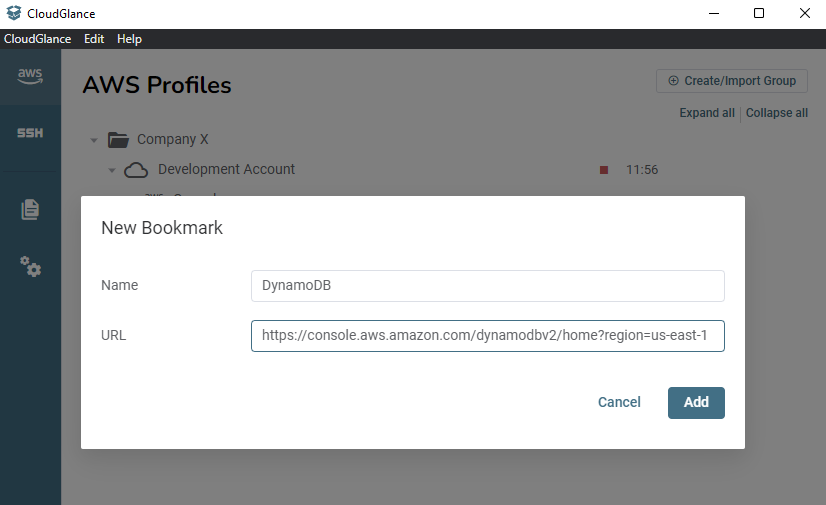
The Icon will be detected automatically from the URL. The service name region will also be shown on hover.
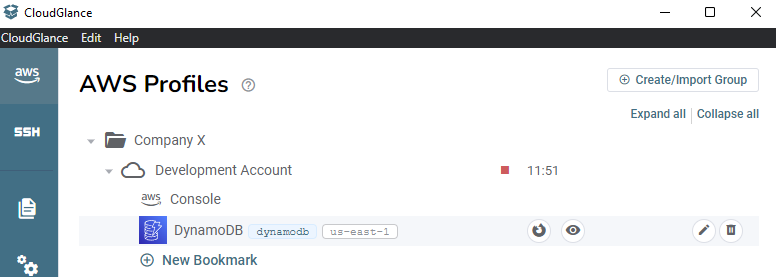
Clicking on the bookmark row will open the DynamoDB console in either Firefox (within the container) or Cloud Glance. This is dependent on the Default Browser setting. Alternatively, you can click on the Firefox or the Eye button to not use the default browser.
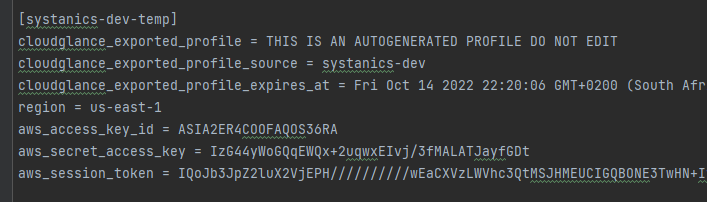
Step 5: Export Profile (Optional)
You can specify the Export Profile Name field to export a new AWS profile that contains the temporary credentials as generated with STS. You can then use this new profile name on the CLI or other applications.
WARNING
It isn't considered best practice to export profiles like this. It is handy for legacy applications that might not be able to do role assume, MFA or SSO. Letting Cloud Glance handle this and then just exporting the "end product" aka the temporary STS credential is sometimes required.
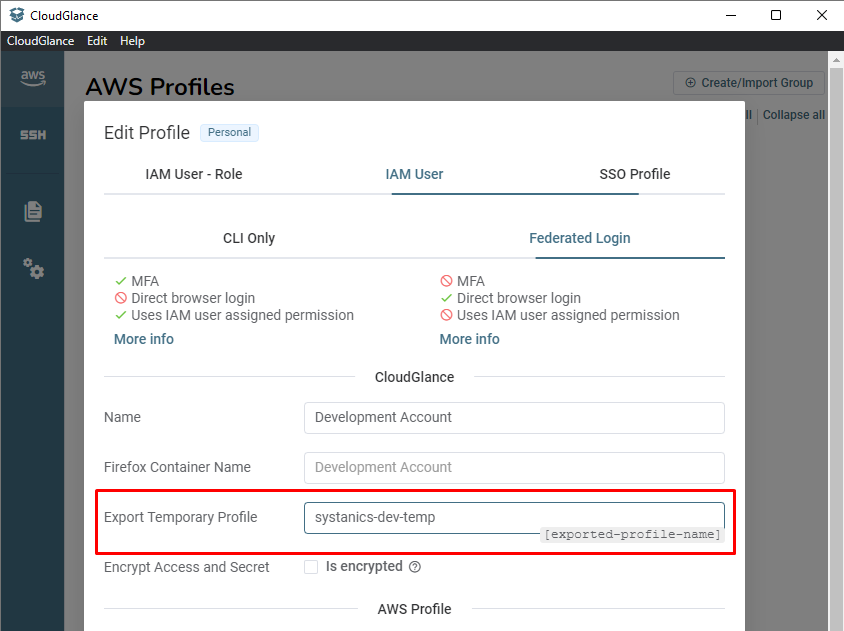
Will export the AWS profile (inside your ~/.aws files) as:
Step 6: Export Environment Variables (Optional)
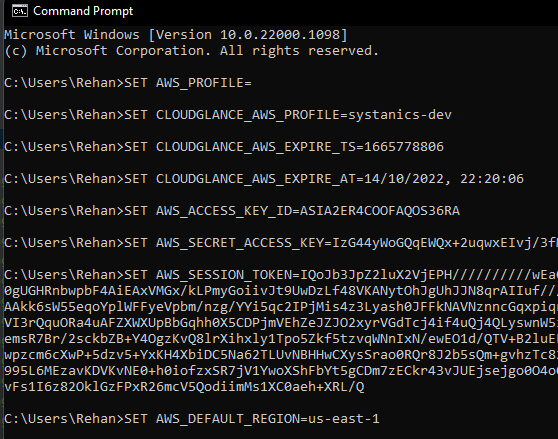
Clicking on the terminal icon when hovering over a profile will copy the temporary STS credentials in the environment variable format into your clipboard.
You can then open a terminal and paste these environment variables. Each of the export commands contains a new line, so it will automatically execute it for the current terminal session after pasting it. You can then call AWS CLI commands without specifying the --profile argument.
TIP
Any Cloud Glance profile can be right-clicked to expose the Copy environment variables button.
What's next?
We only looked at Cloud Glance's ability to manage multiple AWS Accounts and open them within the AWS Console. We did not look at the different Cloud Glance profile types, like an IAM Role or SSO which is also supported, with or without MFA.
Cloud Glance will prompt you with a popup and ask for the MFA code if required and help guide you to complete the whole SSO process in your browser before coming back to the app.
The encryption option of Cloud Glance requires the Cloud Glance CLI to be installed, the CLI will then communicate with the GUI to get the STS tokens for the given profile.
Do you need to connect to bastions and port forward? Have a look at the next Part.