Getting Started - SSH Features
This section will show you how to create your first bastion host for port forwarding.
Prerequisite
- Part 1 of the getting started guide: 1. Installation & Settings.
- Step 1: Create a Group in part 2. Getting Started - AWS Features of the getting started guide.
Clicking on the Create Bastion button will bring up a modal that lets us choose between two connection types used for port forwarding:
- SSH - This is your traditional SSH connection that requires a host, port and
.pemfile for authentication. - AWS SSM - Uses AWS Systems Manager (SSM) this requires the AWS SSM agent installed on the EC2 instance which then communicates to your local AWS CLI to create a secure connection.
Step 1: Add an SSH bastion host
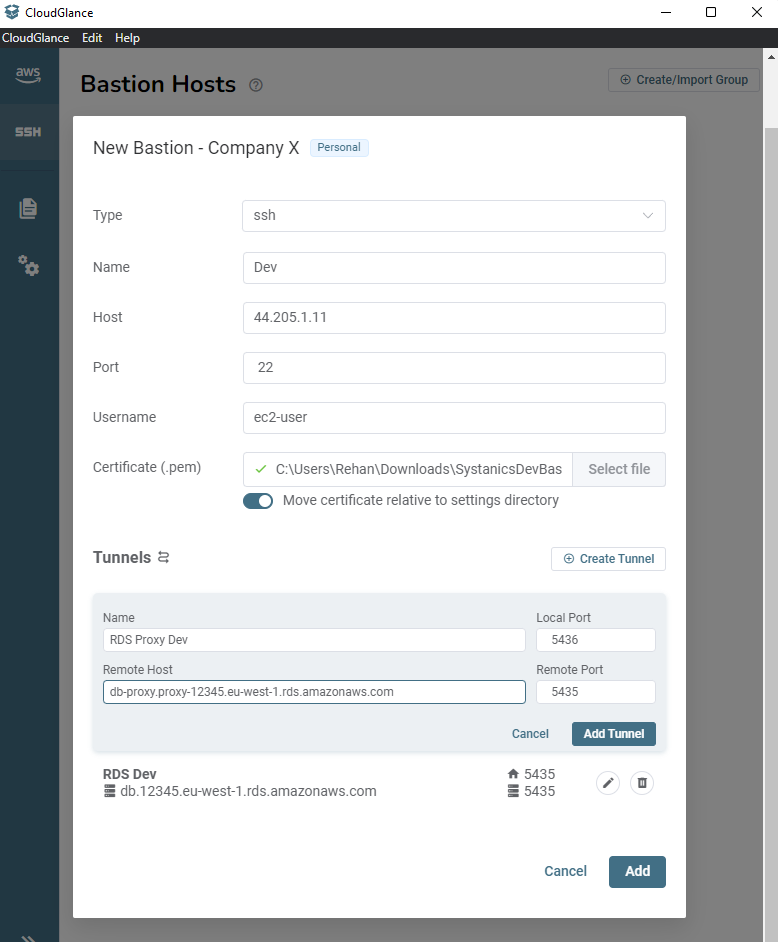
To use the SSH Bastion type, you require ssh. This is included in all operating systems (even Windows 11). Complete all the fields and optionally tick the option to move the cert within your settings directory.
Moving the cert to the Cloud Glance Settings Directory will save it with a relative path to the settings directory in the config file. This is ideal if you are using the team/GIT features to share this profile with others.
Then proceed to add at least 1 port forwarding tunnel. Give it a name to easily identify it and then specify the other fields as:
- Local Port - The port that will be used on your local machine to access the host.
- Remote Host - The address of the host that you want to access.
- Remote Port - The port of the host that you want to access.
The example below specifies two tunnels. Taking the RDS Proxy Dev as an example, shows that we will be able to access the remote RDS proxy service located at db-proxy.proxy-12345.eu-west-1.rds.amazonaws.com:5435 on our machine at localhost:5436.
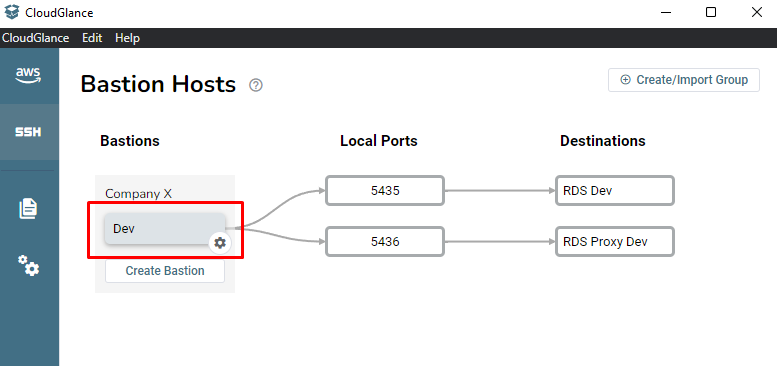
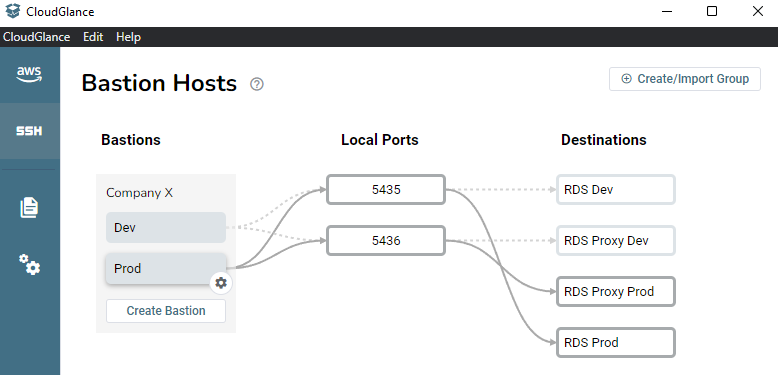
There are three columns to visualize your connections.
- The Bastion column shows you bastions grouped similarly to the AWS profiles.
- The Local Ports column shows which bastions are forwarding to which local ports. It will also show any active local port not used by Cloud Glance as orange and indicate that the connection can not be made.
- The Destination column shows what port forwarding host is using the local port on your computer.
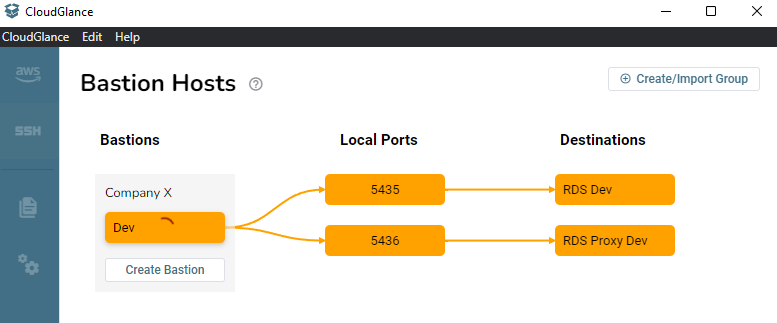
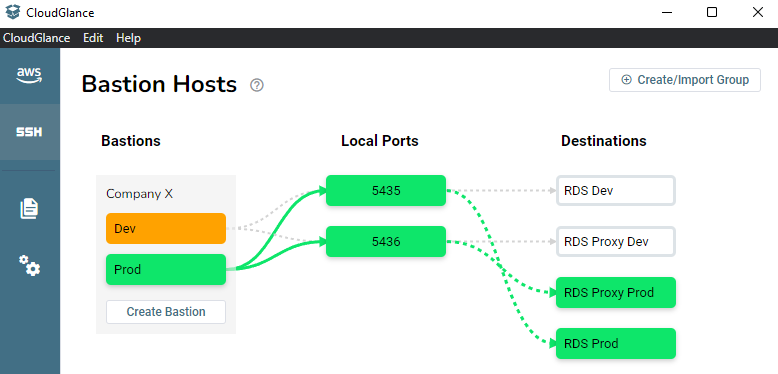
Clicking on the Bastion name will start the connection and both tunnels.
Orange indicates that the connection is being made, it usually takes a second before turning green.
Green is an indication that you are connected.
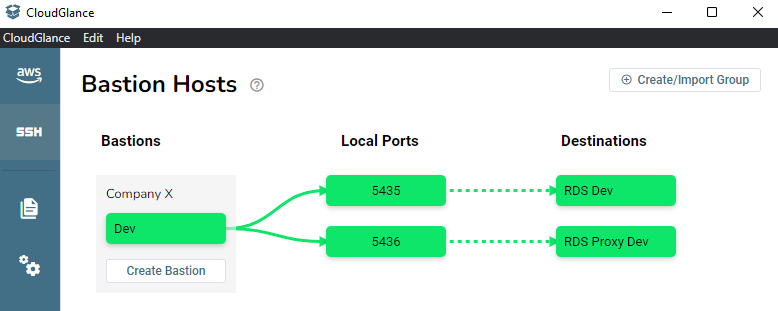
Next, we see how to add an SSM bastion and what happens when two bastions are using the same local ports.
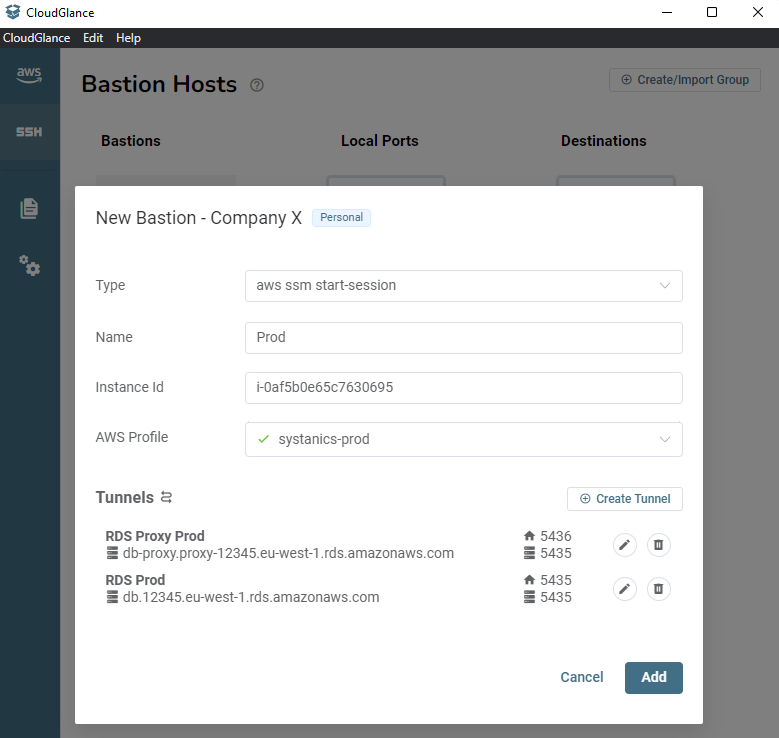
Step 2: Add an SSM bastion host
To use the SSM Bastion type, you require the session-manager-plugin to be installed on your machine and the SSM Agent version > 3.1.1374.0 installed on the EC2 bastion host.
Setting up the EC2 and bastion is out of scope for this guide, you can follow this guide, Step 1 to 3 and rather use the AWS Managed AmazonSSMManagedInstanceCore policy instead of the mentioned AmazonEC2RoleforSSM policy that is going to be deprecated soon.
Select the Type as aws ssm start-session, give it a name, fill in the Instance Id of the EC2 bastion instance and select the AWS Profile that will be used. Here I created another two tunnels using the same local ports, but they are using the prod host addresses.
Hovering over one of the bastions shows its port forwarding rules by making the path a solid grey line instead of a dotted one.
Starting the bastion by clicking on Prod, turns these paths and nodes green. It will then mark any other bastions (Dev) that use the same local ports as orange to indicate that it can not be started. This is because those ports are not open, and as we can see, they are being used by the Prod bastion.
What's next?
The next part will show you how to create Tracked Security Groups that updates Security Group rules with your IP address.